INTRODUCTION
Since I'm always in a search for a new challenge and a really good project I have decided this time to build in python programming language my own GPS tracking server. Server should receive connections from GPS devices (both protocols TCP and UDP should be supported). Server must accept GPS data, proccess the data and than load that data in real time to the viewable map. This is the result and description of my project.
Requirements! This is the list of things I have used during the project:
- GPS tracker TK103B
- SIM card (GPRS)
- Router (port forwarding)
- Apache2 server/MySQL database
- TCP server (python)
- Django application
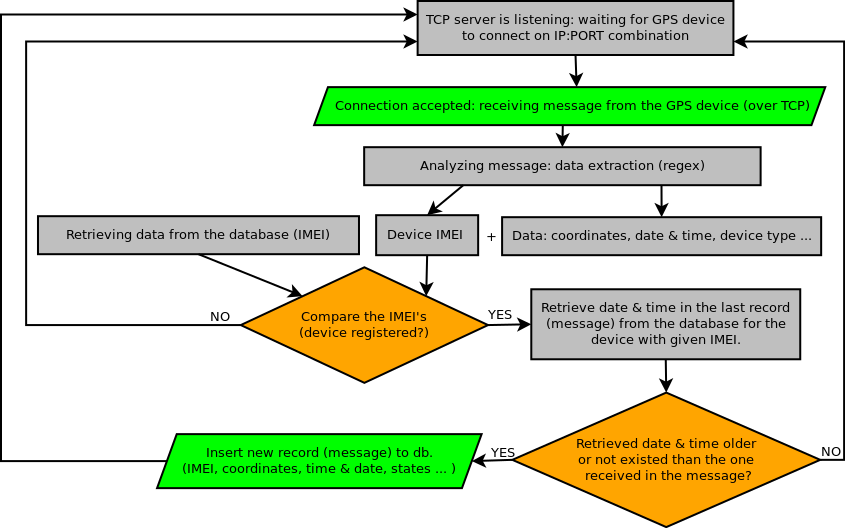
Picture: Flowchart logic: receiving, analyzing and inputing data to the database.
Step one
To activate the GPS device you need to insert SIM card with GPRS capability inside the GPS device. Than I took my GPS device and connected it to power since I don't know how long battery on GPS device can hold (I made my own adapter). Next step was to setup the GPS device (password, IP, PORT, APN, TCP or UDP) by sending the SMS messages to SIM card inside the GPS device (to bad there was no port for serial connection available). Last step was to activate the GPRS capability. After activating the GPS device, device was able to send data over the internet to my test server via GPRS.
REMARK: Data sent by almost any GPS device can be sent using TCP and UDP protocol. TCP connection has sligthly bigger overhead than the UDP and reqiures a little bit more bandwidth, but as a result this connection has great reliability during the data transfer. As I said, data can be sent over UDP protocol as well. UDP doesn't require any handshakes to establish the connection nor overheads to maintain the connection. Since it is conenctionless type of data transfer. Meaning, the integrity of the transfered data may be endangered.
Step two
I had to code TCP/UDP server which should listen for incoming connections on the specific combinations of IP:PORT. I used port forwarding for that and it worked like a charm. Server was runnimg and TCP request for connection came through immediately, connection was established with the GPS device over the prefered protocol (TCP). GPS device started sending the data, TCP server received it (I used regex for data extraction, picture bellow). After the data extraction, checking was done to check if it is allowed device by reading the IMEI value of the device and comparing it to the list of the allowed devices. If device is allowed data is sent to the Django application (or to database, this I coded after the testing phase). If data is valid database is updated with new records like: IMEI of the device. date/time, location (latitude/longitude), speed of movement, elevation, other flags (car engine started etc.).
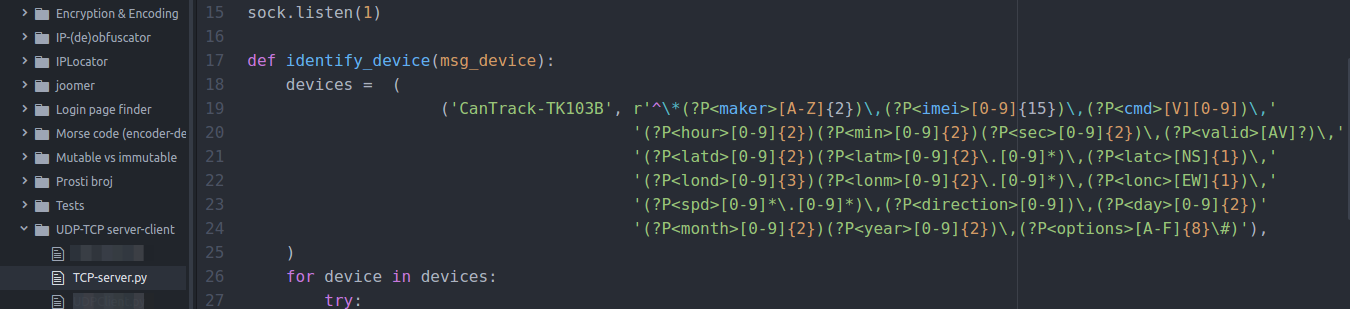
Picture: Data extraction from the TCP server, regex & data reading
Asyncio and uvloop TCP server
TCP server version 2 (coded a month after) uses asyncio i uvloop (uvloop is a fast, drop-in replacement of the built-in asyncio event loop, uvloop can procces up to 100 000+ requests in 1 second). But, reason why I love this is that you can create many parallel TCP proccesses (TCP servers if you will) with different PORT numbers. On the picture bellow you can see older version which wasn't using uvloop and asyncio and was able to maintain single server instance on port 8000. Server was able to work with only one TCP instance. New server is able to listen on multiple PORTs for different GPS vendors which makes easy to recieve, decode and read data from any number of GPS devices.
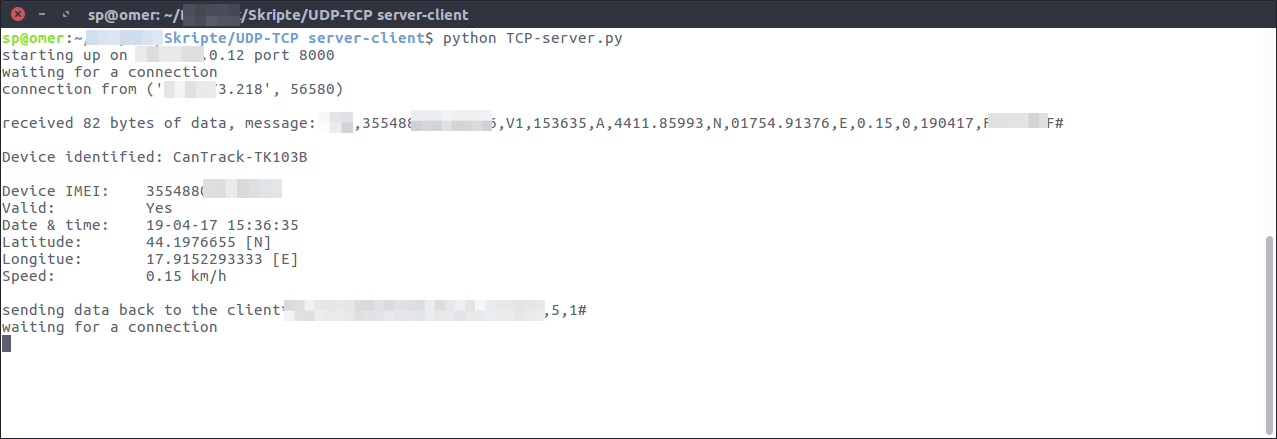
Picture: TCP server listens for connection, accepting the connection if device ID is allowed and receiving the data
Step three
Decoded data, after were validated are saved to database or file. After that, data can be used inside the Django (geo)application that I created especially for this purpose. This is the map (first version) I got after the data was loaded to the google map.
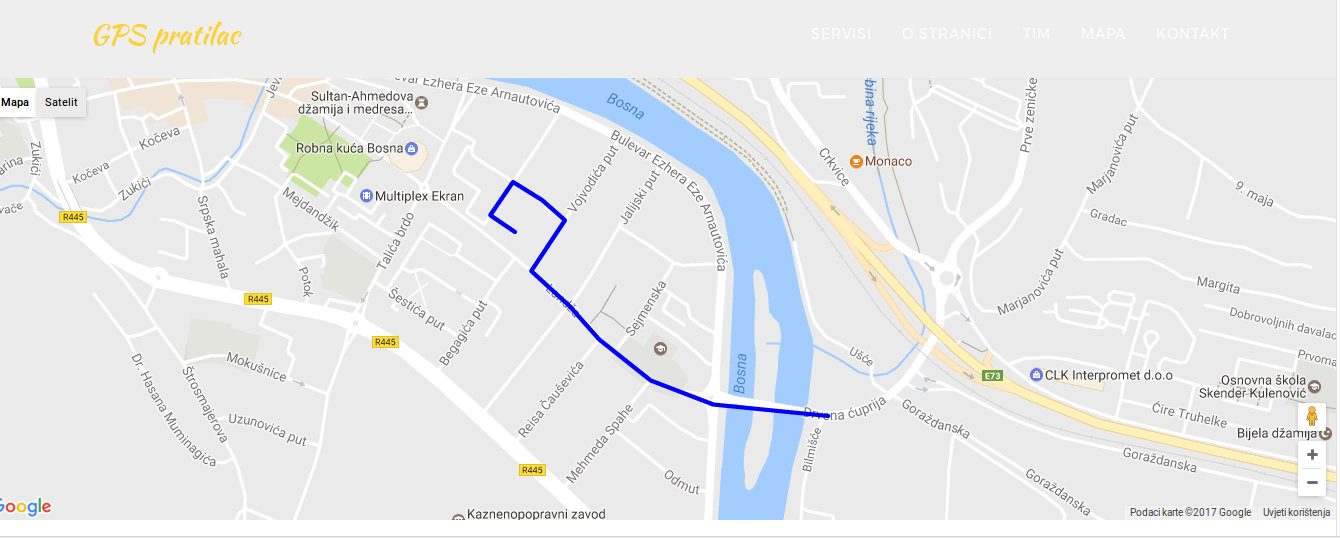
Picture: Django/python application, web site is completely operational and ready to track the device
Step four
Usage! I can use my app free of charge and track any device as long as I decode it's message. There are no any fees for me anymore. Next thing to do will be route mapping.
EDIT:
After some time I used OpenStreetMap (OSM) and MapBox layers to show the map with Leaflet library.
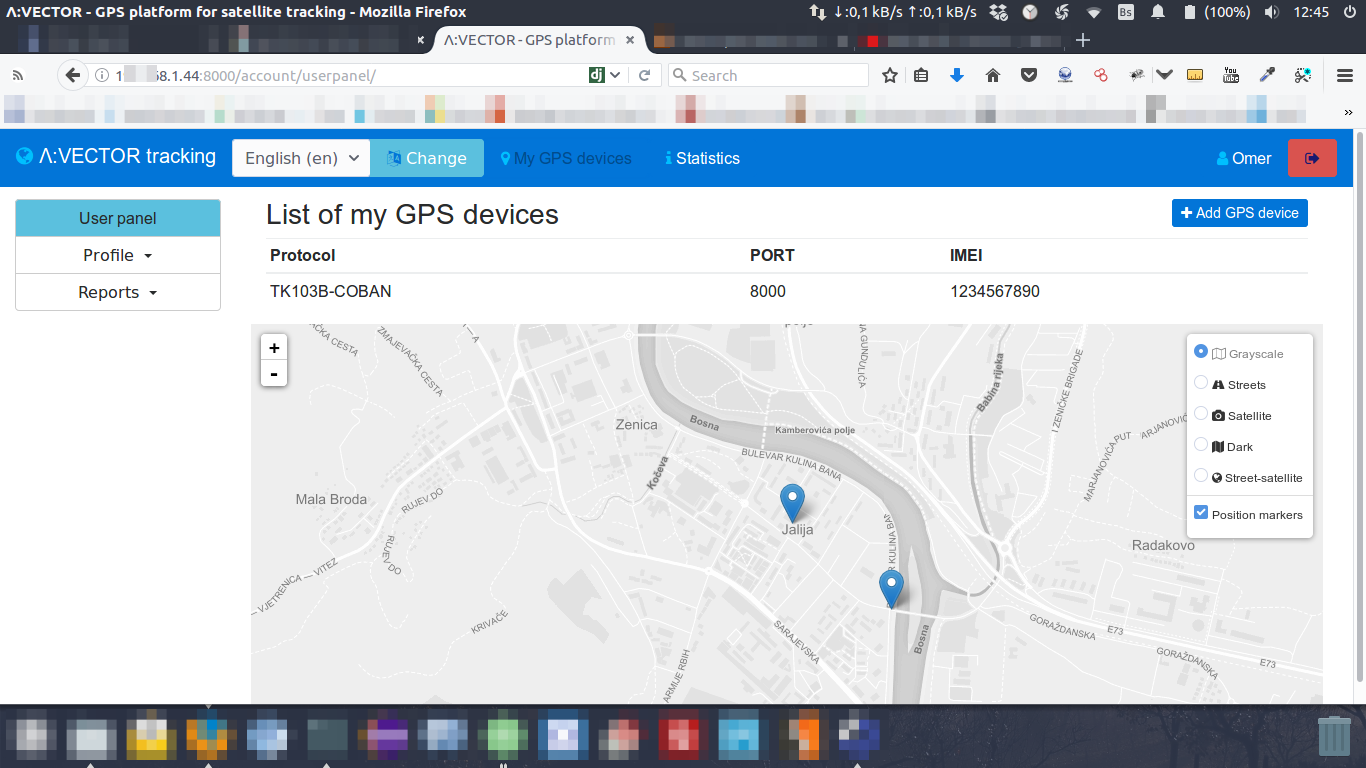
Picture: Backend user my own Django/Python vector tracking app
Thanks for reading.